Thursday, 5 April 2018

Upgrading Lenovo X220 with X230 motherboard - Part 1

So few months back I found a sweet deal for an old X220, which I just couldn't refuse. The machine came in pretty great shape. Since I really can't see myself using an HDD as primary disk nowadays, I bought SAMSUNG 850 EVO 250GB for my system and overall, I was pretty much satisfied with the laptop. Watching many videos going through user's experience, gaming capabilities etc. I found video, where user talked about modded bios and some of it's advantages. That led me to different mods, like Nitrocaster's FHD mod, X230 classic keyboard, you name it.

Reading about people who swap X230 keyboard for the older X220 one got me thinking about other swap possibilities, and since X220 and X230 are almost the "same", I quickly started to think about upgrading my "new" X220 with something more powerfull - X230 motherboard. I must admit, that even when I searched a lot, I have found some forums with people asking if this is possible, but I did not find any user who has really done a finished the process, which really got me to write this. Prior to the whole thing I was comparing the motherboards, trying to get ready for the possibilities that could happen and how to deal with them and few things came up.

1. The X230 uses a mini DisplayPort, not the ordinary and bigger DisplayPort (but it is practically at nearly the same place).
2. The classic keyboard mod will be needed to be done, since it literally will be X230 laptop in X230 chassis.
3. X230 has some kind of authentication chip, which forbids you to use X220 batteries.

After few weeks of searching for a cheap X230 motherboard on EBAY, I finally found another sweet deal for i5-3360M motherboard. Upon recieving the motherboardm, I immediately started the process. This is how it went. 


Dismanting the laptop

I was using this guide:
http://www.myfixguide.com/manual/lenovo-thinkpad-x220-disassembly/

There was really nothing difficult about this part, since this laptop is modular. Just follow the guide and you will be OK. 

When I got to the point, when the motherboard was fully out of the laptop, I tried to compare them for any kind of differences. I found only two of them.

1. DisplayPort, which I already knew about.
2. Speaker connector. You can see it on the picture. This one is from X220, X230 has it in the same place, but in different possition. This change does not cause any problems.


Upgrading the motherboard and modifying keyboard pins

Motherboard alone went into chassis just fine, no problems anywhere. Since there was no external power connector on the new board, I had to use the old one. I put everything back as it was, BUT there was one and only thing to do, before turning on the laptop. If you want to use the old keyboard, you have to modify the pins, so they wont burn out.

For this part, I used this guide.


It may seem difficult, but it really is not. I used just a bit of electrical tape to cover 3 pins, just like the pictures show.

Testing the system

This was the moment. Anything could happen, since I did not test the motherboard before and even though I have some experience with this kind of things, I really don't play with electronics much.


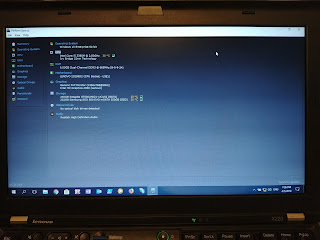
As you can see, it works! WOW! After using Lenovo Update Utility, installing drivers and testing every USB, every port, the laptop works just as expected, or hoped.

As expected, the battery does now work properly. It can be used to power the laptop, but you cannot charge it and there is a warning message when booting the laptop about it. This not concern me as much, since the battery was already at low capacity, when I bought the laptop. I will just get a new one.

Another thing, that does not work properly, or 100%, is the keyboard. This was also expected, since I did not flash my EC so far. 

The last thing is the display port. There is a lot of empty space around between the port itself and the bezel, as you can see in the picture. Covering it a bit sounds like a good idea, not really sure how so far though.


Is it worth it? Pros/Cons?

In my eyes, this whole swap was definetely worth the work. With the new MB I have gained:

- two USB 3.0 ports (used to be 2.0)
- slightly better CPU
- moderately better GPU
- one spare motherboard

Possible cons:

- loosing some keyboard functionality - patch here: https://github.com/hamishcoleman/thinkpad-ec
loosing old and used battery with low capacity - ok, so this is not true after all. The battery whitelist can be disabled by the same patch as above. By default, the patch is configured only for keyboard, so you have to reconfigure it by yourself. Read docs/CONFIG.txt for mode details. I patched both and can confirm it works.
- loosing AC wifi card. I am kind of sad about this one. I have recently purchased the Intel 7260 AC Wireless Card, which has worked flawlessly on X220. For this to be working, you have to be on modified bios. For X220, this process is pretty much without problems. For X230 on the other hand, this does seem more troublesome and I have still read about the options here.

TODO: 
Just looking after FHD mod. Since nitrocaster's mod is not available, I am looking elsewhere.

So this is it! Let's enjoy new laptop in old body!

Tuesday, 20 March 2018

Modify DPM protection groups in powershell

We have been backing up our workstations for a very long time, but one day it strike me, that our workflow, which consisted of shared checklist edited by two people, is kind of troublesome. Since I like to automate everything I can, I started to make this little script, which saves me a lot of work.

We administrate a few companies in our group, every one of them has its separate organizational unit in AD. When I created our DPM Protection Groups, I created it the same way, so every company has its Protection Group as well.

Script is supposed to get list of newly added workstations from specific organizational unit and add them to its Protection Group on DPM server.

# Import the DPM PowerShell module
#You can get installPath variable either from registry or set the specific local path.
#$installPath = (Get-ItemProperty -Path "Registry::HKEY_LOCAL_MACHINE\SOFTWARE\Microsoft\Microsoft Data Protection Manager\Setup").UIInstallPath
$installPath = "C:\Program Files\Microsoft System Center 2012 R2\DPM\DPM\bin\"
$dpmModuleFullPath = $installPath + "Modules\DataProtectionManager\DataProtectionManager.psd1"
Import-Module $dpmModuleFullPath

#Variables
$DPMServer = "DPM_SERVER_FQDN"
$WorkingPath = "C:\Program Files\Microsoft System Center 2012 R2\DPM\DPM\bin"
$LogDirectory = "C:\Scripts\DPM\Logs\added\$Date\"
$MailRecipient = ""
$MailSubject = ""
$SMTPServer = ""
$MailSender = ""
#We have different AD containers for each company in our group. I use these names as protection group names as well, this comes very handy later in the script.
$Companies = "ORGANIZATIONAL_UNIT_A", "ORGANIZATIONAL_UNIT_B", "ORGANIZATIONAL_UNIT_C", "ORGANIZATIONAL_UNIT_D", "ORGANIZATIONAL_UNIT_E"

$Date = Get-Date -Format yyyy-MM-dd
#Script is supposed to run every week, so we just want to add computers from last few days and limit the amount of stations we work with on every run.
$Recently = [DateTime]::Today.AddDays(-8)

Set-Location -Path $WorkingPath
New-Item -ItemType Directory -Path $LogDirectory

#HTML header with some CSS
$HTMLbody_header = "
<!DOCTYPE html>
<html>
<head>
<style>
#os {
    font-size:10px;
    color: #9f9f9f;
}
th, td {
    border: 1px solid;
    border-color: #cccccc;
    padding: 15px;
    margin: 0px;
    border-spacing: 0px;
    font-weight: normal;
}
table {
    background-color: #fcfcfc;
    padding: 5px;
    margin: 0px;
    border-spacing: 0px;
}
body {
    font-family: Verdana, sans-serif;
    font-size:12px;
}
</style>
</head>
<body>"


#Start HTML body
$HTMLbody = "
<h3>New DPM backups.</h3>"


foreach ($Company in $Companies){
    #Get content from AD for every company.
    #DO NOT FORGET TO SPECIFY YOUR OWN PATH
    $Searchbase = 'OU=OU_NAME,OU=OU_NAME' + $Company + ',OU=OU_NAME,DC=DC_NAME,DC=DC_NAME'
    $List = Get-ADComputer -Filter 'WhenCreated -ge $recently' -Properties whenCreated -SearchBase $Searchbase
    $LogFile = $LogDirectory + $Company + ".txt" 
    $Computers = $List.Name 

    if ($Computers){
        #Define HTMLbody table
        $HTMLbody += "
        <h3>$Company</h3>
        <table>
        <tr style=""background-color:#f3f3f3"">
        <th align=Center >ComputerName</th>
        <th align=Center >Status</th>
        </tr>"

    }
    foreach ($Computer in $Computers){
        #Add content to HTMLbody table
        $HTMLbody += "
        <tr>
        <td align=left >$Computer</th>
        <td style=""background-color:#acfa58; color:#379510"" align=center >ADDED</th>
        </tr>"

        $Computer >> $LogFile

        #Modify Protection Group
        #Since our Companies and Protection Groups share the same name, we can use it to easily specify which protection group we want to edit depending on which Company's foreach cycle: "Where-Object {$_.FriendlyName.ToUpper() -eq $Company.ToUpper()}"
        #The first command gets all protection groups from the DPM server, and then stores these groups in the $pg variable. You cannot edit these protection groups.
        $pg = Get-ProtectionGroup -DPMServerName $DPMServer | Where-Object {$_.FriendlyName.ToUpper() -eq $Company.ToUpper()}
        #The second command gets the first protection group in the $pg array in editable mode, and then stores it in the $Modpg variable.
        $Modpg = Get-ModifiableProtectionGroup -ProtectionGroup $pg
        #The third command gets an array of protected and unprotected data on the production server, and then stores the array in the $ds variable.
        $ds = Get-DataSource -ComputerNames $Computer -DPMServerName $DPMServer
        #The fourth command adds that data source to the protection group stored in $ds.
        Add-ChildDataSource -ProtectionGroup $Modpg -ChildDataSource $ds
        #Commit changes.
        Set-ProtectionGroup -ProtectionGroup $Modpg
    }
    $HTMLbody += "
    </table>"

}
#HTML footer
$HTMLbody += "
</body>
</html>"


$HTMLmessage = $HTMLbody_header + $HTMLbody_info + $HTMLbody
Send-MailMessage -To "$MailRecipient" -Subject "$MailSubject" -SmtpServer "$SMTPServer" -From "$MailSender" -Body "$HTMLmessage" -BodyAsHtml

Mail output looks like this:

New DPM backups.

Company_A

ComputerName Status
Computer_1 ADDED

Company_B

ComputerName Status
Computer_2 ADDED

Company_C

ComputerName Status
Computer_3 ADDED